Showing posts with label Recipe. Show all posts

Wednesday, March 20, 2019

My Peanut Butter Soap Recipe


Several weeks ago I was asked by the Peanut Institute to make a soap for them based on my Peanut Butter Soap I sell on Etsy on my LeafLoveSoaps page. The story all began when my son Colby who is now 14 asked me to make a peanut butter soap. This was around 2014 I explained there was no essential oil smelling like peanut butter but he wanted anyway. So I set to work and created a recipe using as many peanut related ingredients as I could. Resulting in a nice soap bar and great oils for the skin. 
This is from my Etsy page
Hello I have made peanut butter soap from fresh peanuts, no extra additives, no added fragrances, the bar has a slight smell of peanut butter not strong at all. I would almost say unscented. 

I have used canola oil, organic coconut oil, Sustainable palm oil, Peanut Oil, and organic Shea butter. The soap has no fragrances or essential oils. 

The canola oil contains Vitamin E, an anti-oxidant that will help protect the skin from free radicals, The omega 3 and omega 6 fatty acids can help against premature aging and soothe dry, irritated skin.


The Sustainable Palm oil helps to make the bar hard and last longer. 


All my soaps come from non-smoking handmade in a clean environment in a craft kitchen specifically designed for soap making. All soaps are made in small batches to ensure quality. 

All the soaps come in a cardboard box made with recycled cardboard. Properly labeled.

The Ingredients of this soap are:
Organic coconut oil, Canola Oil, Peanut Oil, Shea butter,
Lye, distilled water, organic peanuts. 

However the peanut institute wanted me to add essential oils, oatmeal, brown sugar, and peanut hulls. Which all these are optional in the recipe. 

                                                                The back of my label
The box being packaged 

Bruce went in to mail the boxes to Georgia 

I am not going to go into the making of the soap but if you are new to it please watch YouTube videos and look up famous soap makers like Brambleberry  and others who have extensive videos and recipes...etc....

I have been making soap since 2003 and started off when you could hardly get books, supplies etc. some of my first books were for the 70's and they were way outdated but the concept was there. Great help when nothing else was available. 
NOTE: ALL MY RECIPES ARE MADE TO SUIT MY MOLD SIZES this 62ounces will work in a five pound mold with what use for the wee bit extra we have silicon molds like an owl or hearts or whatever silicone mold you may have we even have 1 pound wood molds. 

So adjust to you needs 

PEANUT BUTTER SOAP RECIPE 
Canola oil 20 ounces (we use the Healthy Harvest Brand)
Coconut Oil 14 ounces (we buy from Bulk Apothecary)
Sustainable Palm oil 20 ounces (look for the Green Palm) (CSPKO)
Peanut Oil 6 ounces (we use the spectrum brand) 
Shea Butter 2 ounces (we always buy the organic however I am always having to buy from different sources) 
20 ounces of distilled water (however we catch rain water) 
8.76 lye 

{ depending on your rate we use a 3% or 5% }

ADDITIVES
of course CREAMY PEANUT BUTTER 3/4 cup we use the organic peanut butter from Whole Foods with the least ingredients. 
2 TBSP. of peanut hulls (optional) ground with a coffee grinder 
if using essential oil I used per request of the Peanut Institute a Peppermint and a lavender essential oil which we get from Bulk Apothecary. We use the Bulgarian Lavender. 
I used 3 ounce of lavender essential oil (optional) if you would like lavender soap. If you would like a peppermint soap I used 2 1/2 ounces of spearmint essential oil and 1 ounce of peppermint essential oil. 
Then per request sprinkle with brown sugar and gluten-free oatmeal from Bob's Red Mill (you want to use the gluten-free oatmeal to be sure that it is gluten-free) 

The video on the soap making in my soap kitchen 

At the last show at Indian River High School 

Some of my body products and salves and jewelry 

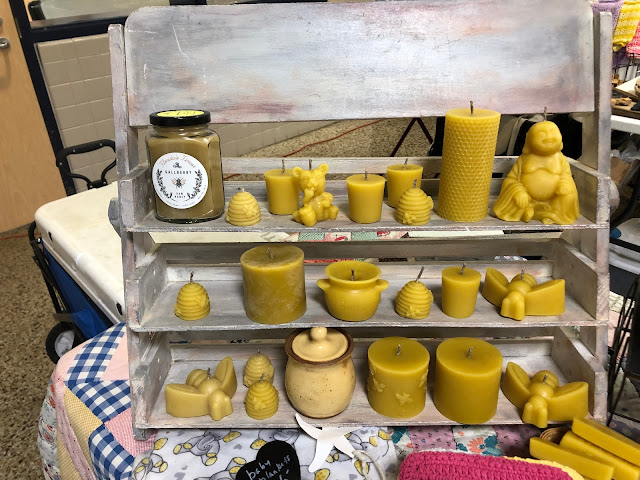
Some of the beeswax candles I make which I have videos and a blog post on rendering down the beeswax from our bees. I bought all my molds from Mann-Lake Bee


The video I made for rendering down the beeswax

I also made a video on how we spent St. Patrick's Day 


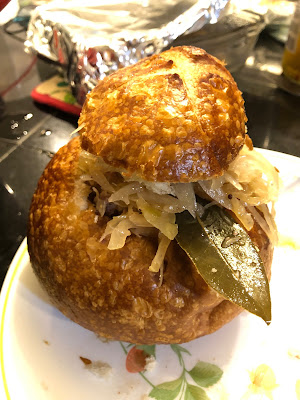
This bread bowl my dear friend Aylene sent over and I made these for the boys with our homemade sauerkraut 


The Irish Soda bread I shared the recipe in the video above 

Of course we use the cast iron pans for everything....this bread is one of the boys favorite 


This was Saturday at the Indian River High School show I just keep telling Bruce we got to see the Easter Bunny.......just tickles me 

Tomorrow is another show for two days then Great Bridge on Saturday 
Tomorrow we will be at Va. Beach General Hospital for the spring show 

Then Saturday at Great Bridge High School 


Yesterday I spent the afternoon at the dentist for yet another dry socket on my right side.....more to come on this. 

HAPPY SPRING 

Today is the first day of spring and yet I am sitting here typing this freezing.... I know I am always cold but the day was a high of 50  I had both heaters on in the greenhouse and it was cloudy and has sprinkled off and on all day....so looking forward to SPRING!! 
Hope you are having a wonderful day and getting to be artsy or cooking up a great meal. 
Sending cyber hugs, 
Dawn 


Sunday, March 18, 2018

How I make Elderberry Syrup and Some Updates

                                                                               So many have asked me how I make the elderberry syrup, I have decided to go ahead and post my recipe. I have been making this since 2015 and  I CERTAINLY CAN let you know I am a believer. It works! Yesterday I was at the Deep Creek High School for the craft show. It was very slow but I did see so many of my regular customers, THANKS again for all your support. When I got home I was sooooo tired that is putting it mildly. After Thursdays adventure I just was not caught up with my needed nutrients for the body. I have been steadily trying to build myself back up.  When you have low iron it is hard, and to mention I had to go 5 days before the procedure without it. Above is the picture of the finished elderberry syrup jars. You could use anything like a jar or a bottle to put your syrup in. Which ever you choose.
I use 3/4 cup of elderberries, if you don't have a bush (which they come in this area in August) you can find them here on Amazon. I always use the organic brand but really the only pest I know is the birds. You have the usual ants, and other critters but nothing to terrible if you stay on the watch and pick when ready. You must only pick the ripe berries as they are poisonous and so are the leaves and plant itself, plus the tree. You will have to pick through the batch to make sure you only have the ripe berries and no stems or leaves. They used to be a lot cheaper back in 2015 but I guess there popularity has the price increased. Gather all your ingredients I use a large piece of ginger grated up its about four Tablespoons, 2 teaspoons of cinnamon I only use the Ceylon cinnamon.  I buy this at Smithfield Farmers Market. You can also buy it here at Amazon. This cinnamon is much better for you then the one you buy in grocery store. Look for Ceylon cinnamon in Whole Foods or any of your organic stores. 1-2 teaspoons of organic cloves. You can find these here on Amazon too. I really like these and since I cook and make a lot of stuff I am very happy with these.   You want to measure out the 3/4 cup of berries and 4 cups of water (I only use the purified water) I know it gets simmered but I don't want to start out with chlorine or whatever else is in the water. I use a large skillet that is deep like a stainless steel one. Put all these ingredients I have mentioned in the pot as well now. I have them simmer for about an hour or so (always mark where the water and berries start and measure as you want the water to decrease by half) I look at the bolts on the handle to measure with. Then I allow it to cool completely. Then I use a strainer like you see in the pic above. A large bowl and I start straining the berries and the liquid. You will see the cloves, and the ginger in the mix just strain as you would the berries etc. The cinnamon will go through the strainer so no worries.
The berries in the strainer. 

Once all strained you will add your honey (now you strain twice if you think you dropped a berry or two in) I always strain twice to be sure but basically the second time you are just pouring liquid through the strainer. I add our honey that we had just extracted. It is just a beautiful dark honey. 

1 1/4 cup of honey is what I use. 

Using a stainless steel whisk mix well, mix until the honey is incorporated into the syrup. 

Here you can see how much honey I used but I make larger batches than most would. I have my kids take this too and Bruce and I both take it. I feel it really does work. You can add other ingredients like rose hips or even other herbs that you would like to use. Store in the refrigerator.  
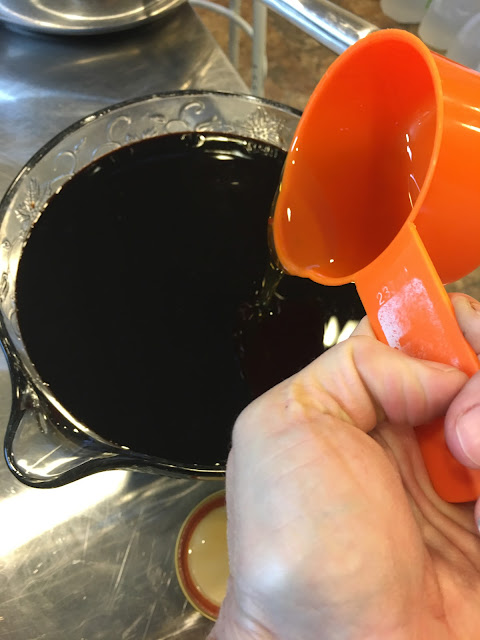
You can see how dark and beautiful it comes out. Doses are 


   Adult Daily Maintenance: 1 Tablespoon 
Children 2 and Up: 1/2 to 1 teaspoon

Adult Intensive Use: 1 Tablespoon every 2-3 hours
Children 2 and Up Intensive use: 1/2 to 1 teaspoon every 2-3 hours.

This product and the information provided has not been evaluated by the Food and Drug Administration. This product is not intended to diagnose, treat, prevent or cure any disease. #9 Farms is not responsible for the improper use, reactions or results from how you use this product. Please contact your healthcare provider with any questions regarding the safety of this product and before adding any herbal supplement to your diet.   

The syrup is not intended for any child under the age of 2.

I just shared how I make my syrup there are many recipes on the internet and you may use them or do as you wish.

You can read the benefits of elderberry syrup here

and Here

I hope I provided you some information to get you started on making your own elderberry syrup.

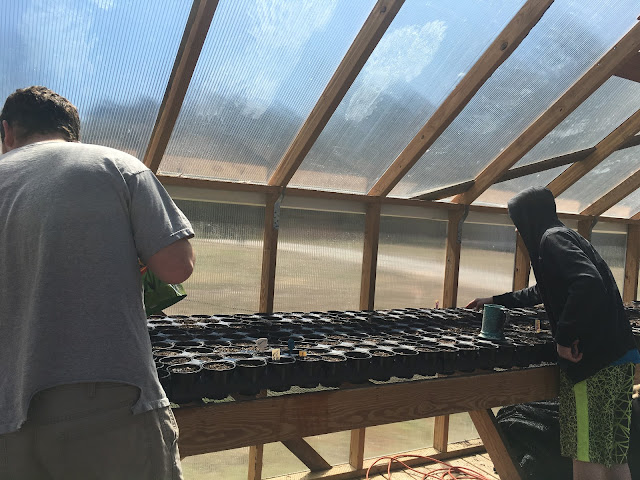
 Today while it was sunny we worked on planting the rest of the seeds which was so nice to be in that greenhouse that sun felt so good on my skin. The boys worked hard at helping.
 We finally now have all the seeds done that will be in the pots. We will plant directly in the soil when it is time to.
A lot of our seeds are already coming up we did about 10 days ago. Now I will have to transplant these. These are tiny early jalapenos. 

More jalapenos 

Okra this year I also planted the crimson okra 

I love TimeHop this was exactly a year ago we were building bee boxes but this year I think we will have enough from what we did last year and this year too. 

Dusty playing with the chickens, Jewelee gets so jealous when anyone gives love to someone other than her. LOL! 


The high tunnel is ready to go...I planted radishes today directly in the soil

All ready for planting in the high tunnel 

This was yesterday at the show in Deep Creek at the High School 


I had only bought one space to save on fees which can be very costly especially when all of them are due all at once basically and now its already to pay for all the fall shows too. I was ready for St. Patrick's Day. It was nice to see everyone in their St. Paddy's Day attire. Its always fun to dress up for this. 
Next week we will be at Daffodil Festival in Gloucester Virginia

 Have super duper week. I just finished the cheese up for tomorrow before I did this post and tomorrow I am making some jams for the weekend and printing labels for soap. My aunt said she would come by to put them on the soap boxes. Have a good one....and they are calling for snow here again on Wednesday of course the boys are excited about it. I hope it doesn't snow.
Sending ya good vibes for the week..........until next time.
Dawn Gallop

Saturday, February 24, 2018

My Kombucha Recipe and The Making of the Kombucha


Hello all I have been making kombucha since 2015 and I kinda feel like now I have sorta mastered it, no not ready to write a book on it but can share with you a bit of how I do it and how much my husband and I enjoy it. So at the bottom I am putting in my recipe and where I originally got the Scoby (Symbiotic colony of bacteria and yeast)  We have been making beer and wine off and on for year since like 2001really it may have been more like 1997 or so I can't really remember. We first learned of this at Wine and Cake Hobbies in Norfolk Virginia. We have been loyal customers since I know like 1988 or 1989 I was going there trying to figure out cake decorating when my oldest son Bruce Jr. was a baby. He is now 31 years old. Wine and Cake Hobbies have been excellent in providing me a place to shop and teach for all my hobby needs over the years. I have bought all my bottles from there and wine making and beer making supplies. Oh and cheese making ingredients. Chris can order you a Scoby from Wine and Cake too.  Thanks Wine and Cake!!  
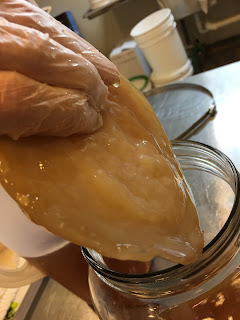
This is the Butterfly Pea Scoby which turns the most beautiful purple color, and not to mention taste Yummy! It is made with the butterfly pea flower tea which is a caffeine free tea. The tea possess many antioxidants. Known as Clitoria Ternatea, Asian Pigeon wings and other names like blue pea. Known for brain booster, anti-stress, and calming your nerves. Has many properties for providing many health related issues. Great for stress and anxiety. An amazing herb which could be f=grown around here at least in the summer. It is known for Zone 9. You can buy seeds to grow some right here. You can buy the tea flowers HERE  You buy your Scoby with some of the Butterfly Pea Tea at Zenobia's Garden
This is one of the places I have bought excellent healthy Scoby's from and they are amazing they ship fast and everything comes with excellent instructions. 

This is another pic of the butterfly pea scoby I always wear gloves with so you don't transfer any germs or oils from your hands 

I use some of the half gallon Ball jars and old pickle jars (which I learned something amazing from Tiffany Don't Waste the Crumbs) which you soak the jars full of hot water and Dawn Dish soap and soak turned upside down for several days and I tell you it works!!!! When you dump the soapy water out and wash like normal and dry there is no vinegar pickle smell left behind and you can now use the pickle jars for really anything. I also use the 2 1/2 gallon jars you buy from Target or Walmart which we have had for many years. They used to be $9 bucks at Walmart and I stored a lot of stuff in them like my cookie cutters, flour, and other stuff. We only use purified drinking water and we also use that to make the tea too. We have the stick on thermometers on most of the jars, the ideal temp for kombucha is 75 -85 degrees Farenheight. Which is perfect for fermentation. I have a few of the heating blankets jars from Amazon.

See Recipe Below

Bruce usually makes all the tea which I do all the bottling and the second fermentations 
This is one of the first batches and where I split the scoby I add different things for the second fermentation like Welche's Grape Juice 100% juice, Dole Pineapple Juice, ginger, apple juice, its endless. 

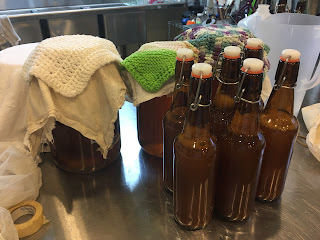
These Grolsch bottles are ready for the second fermentations

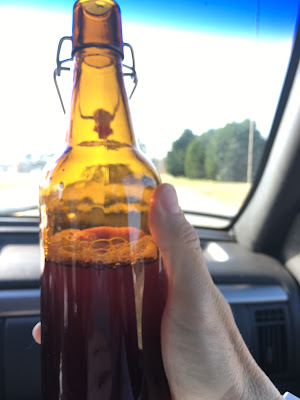
These are the grape after the second fermentation. See all the bubbles and fizz

I enjoy at least one a day whether in the car of just working around the farm 

This is the pineapple ginger (just grate up a thumb size piece of ginger root) add some to each bottle and add the pineapple usually about a 1/4 cup per bottle and then add the tea allow to sit for several days (all depending on the temps) and once you have the fizz or carbonated part then you have a delicious kombucha or aka at my house as a buch or a buchi 

We make a lot every time for all to enjoy 
Note the stick on bottle thermometer 

a perfect little one gallon jar scoby 

another perfect scoby 


I cover all the jars with muslin and a rubberband and also a crochet cloth or towel if you have issues with the fruit flies especially in summer and fall just have to make sure those little bugs do not get into your buch as they love that fermented smell and will do anything to get to it. So keep it covered well. 

One of the 2 1/2 gallon jars with the large scoby it is best to let your scoby be at last about a 1/4 of an thick 

I also add freezer tape to all the bottles and the brewing jars 

Note the grated ginger in the flat dish to add to bottles of kombucha the bottles are best to rinsed first with a sanitize or no rinse solution like C-Brite you can also buy the bottle drying racks HERE


                                                          Kombucha Recipe

12 Cups of  Purified Water to start (I use one gallon for each batch)
8 Tea bags of Oolong Tea or Black Tea 
1 cup of cane sugar we use the Organic one 
2 Cups of kombucha from a previous batch or if you don't have that or it didn't come with your scoby use one cup of white distilled vinegar I always have the kombucha from a previous batch and it is best to buy the scoby with the extra kombucha 

We brew the tea in a coffee pot filled with the purified water (you don't want any chlorine in the water so I buy the purified water in the jugs)
once brewed add the organic cane sugar and then pour the rest of the gallon of the water in the tea sugar mix allow to cool to approx. 80 degrees then add your  kombucha brew from a previous batch or the white distilled vinegar. Mix in and then place the scoby in.  Then cover well it muslin cloth and a rubber band as you don't want any bugs to get into the tea. I cover with crocheted towels too to try to avoid in penetration of the fruit flies. As they love the stuff.  

I do use some of the bottles from my beer making days and cap with "hooch" bottle caps or the flags If you can't find stuff you want on the Wine and Cake Hobbies Website you can call and they will guide you thru an over the phone order.
These are from the wine and cake hobbies store bottles and item number 
On Valentine's Day I got to make one of my original heart chocolate chip cookies which my family got to enjoy. It was like "old times" I used to make these every year and I still have many of these pans which I will eventually be listing on Ebay as I am going to sell all my cakes pans too. They are all Wilton. 

Ledger celebrated his First Valentine's Day .....#adorable  

Really mom???? 

Dusty got him some new Converse shoes we called the Journeys after the Landstown Craft show and picked them up for him, I was glad I made enough to get them as he certainly has enjoyed these new shoes.  

Converse last a long time too.....they are one shoe I don't  mind spending good money on as Dusty has had a lot of shoes that just don't last no time. 

We have also been working on the greenhouse and I should be planting all my seeds within the week. 

I'm glad to see these cups filled let me tell you it seems to take forever....but we now have both sides completed 

My wonderful neighbor Linda who always thinks of me and is like and angel and when things are tough and I am going thru things more than you can control or sometimes beyond your own control. Linda shows up with bag and hands it to me and wanted to let me know that her Prayer group has been thinking and praying for me and they made me this beautiful prayer shawl. Which brought tears to my eyes and I have been wearing it as much as I can it just makes you feel better. THANK YOU LINDA and THE PRAYER GROUP.......
This is the poem that came with the bag. Again thank you all so much!!!!

This is where we will be next Saturday for another craft show so if you can make it out stop by and see us. 

Have a great week,
Dawn Gallop


Related Posts Plugin for WordPress, Blogger...